Connections
The first tab is used to manage the device connections and monitor their status.
Connection List
On the left hand side, there is the list of connections.
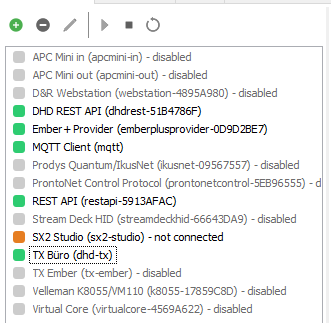
The colored square icon indicates the state of the connection:
- Green: The connection is enabled and running.
- Orange: The connection is enabled, but there is a temporary issue (e.g. TCP connection not established) - check the log for details.
- Red: The connection is enabled, but it fatally failed to initialized (e.g. MIDI device not found) - check the log for details.
- Gray: The connection is disabled.
The tabs at the bottom of the list can be used to arrange the connections by type, location or group, instead of the default alphabetical order.
Use the buttons in the toolbar to manage the connections:
- Add a new connection - see section below for the configuration options.
- Remove the selected connection(s).
- Edit the selected connection. It will be restarted automatically if it is enabled. If the connection ID is changed, the connection will be recreated with the new ID, and all converter rules will be adjusted automatically.
- Start (enable) the selected connection(s).
- Stop (disable) the selected connection(s).
- Restart the selected connection(s).
Adding a Connection
To add a new connection, click the + button in the connection toolbar, or select Connection -> Add from the main menu.
A dialog will appear with a list of available connection types. Select the appropriate protocol, and click OK. You will see the Add Connection dialog:
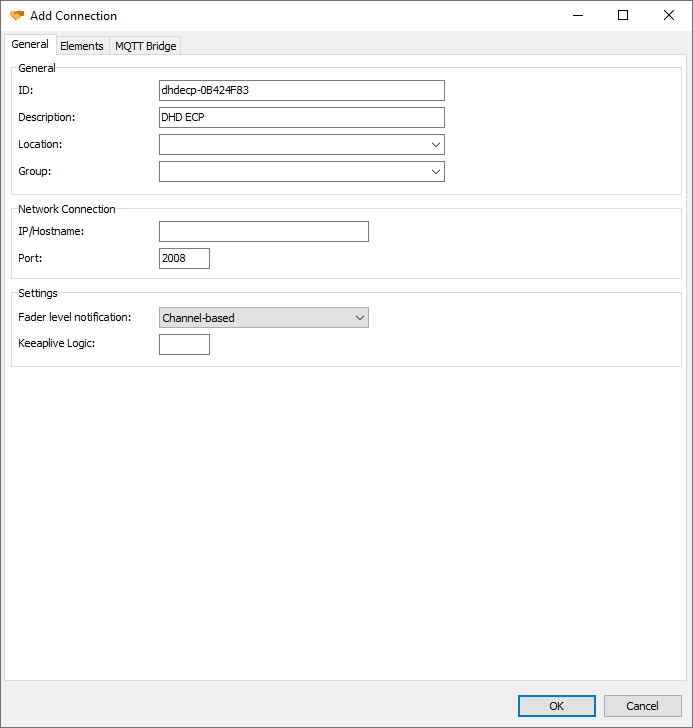
For a description of all available configuration settings, see the protocol reference.
Removing a Connection
To remove one ore more connections, select them in the connection list with the mouse (old down Shift or Ctrl to select multiple items), then click the - icon in the toolbar, or select Connection -> Remove from the main menu.
Connection Status
The right hand side of the Connections tab shows the status of the connection currently selected in the connection list.

Parameters
The first tab displays the parameters provided by this connection, either as a flat list or as a tree structure. For each parameter, the following information is displayed:
- ID
- Description (if available)
- Current value
- Timestamp of last update
The icon next to the parameter ID indicates whether the parameter is read-only (green arrow pointing left), write-only (red arrow pointing right), or read/write (double blue arrow).
For read-only parameters, the current value and timestamp is the one that was last received by the device.
For write-only parameters, the current value and timestamp is updated every time new value is set (manually or via a converter rule).
For read/write parameters, some protocols (e.g. Ember+) echo the new value after an update, and BTConnect does not update the columns until it receives this echo. For other protocols, updates are not echoed, in which case BTConnect updates the columns immediately when it sends the new value over the protocol.
For write-only and read/write parameters, you can perform a manual update by double-clicking the parameter and entering the desired new value in the dialog that appears.
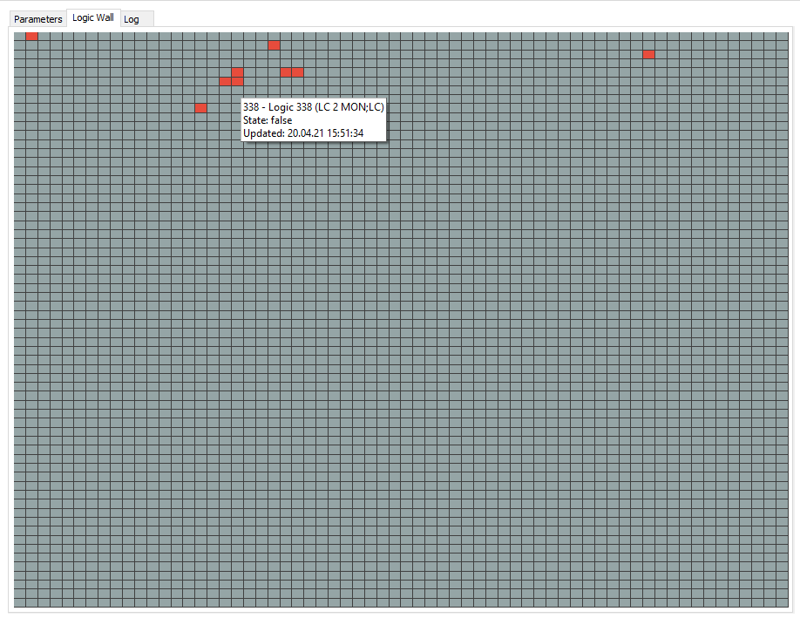
Logic Wall
The Logic Wall tab is only available for connections of the types DHD ECP and Virtual Core. It shows a colored grid of the 4095 available DHD logics; green indicates that the logic is on, red indicate that the logic is off. When hovering with the mouse over a square, a popup shows additional information about that logic.
Log
On the third tab, all log messages related to this connection are displayed. The log is limited to the last 1000 entries and will be truncated automatically. Using the checkbox at the bottom, you can turn on a debug mode which will write all parameter updates to the log.