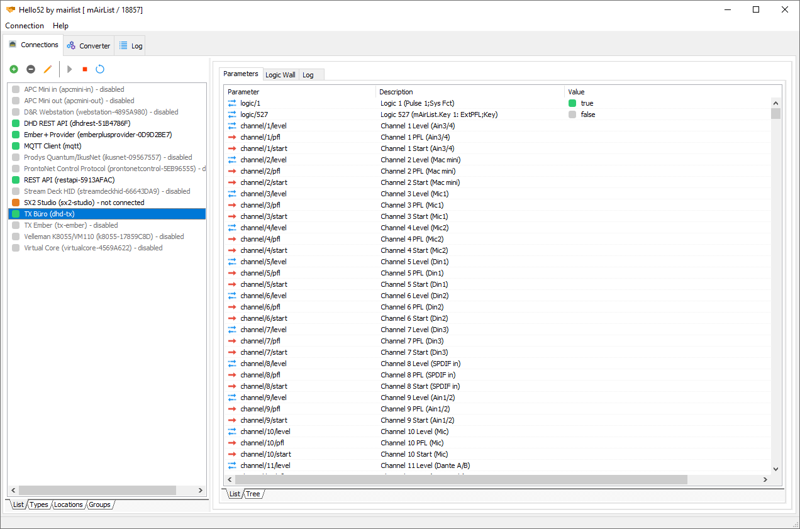
The main window consists of three tabs: the connection list and status, the Protocol Converter, and the log.
This the multi-page printable view of this section. Click here to print.
The main window consists of three tabs: the connection list and status, the Protocol Converter, and the log.
The first tab is used to manage the device connections and monitor their status.
On the left hand side, there is the list of connections.
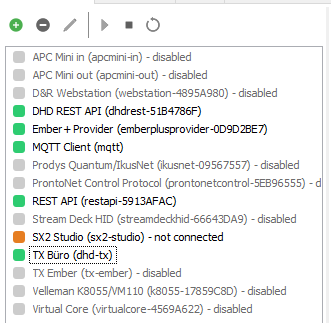
The colored square icon indicates the state of the connection:
The tabs at the bottom of the list can be used to arrange the connections by type, location or group, instead of the default alphabetical order.
Use the buttons in the toolbar to manage the connections:
To add a new connection, click the + button in the connection toolbar, or select Connection -> Add from the main menu.
A dialog will appear with a list of available connection types. Select the appropriate protocol, and click OK. You will see the Add Connection dialog:
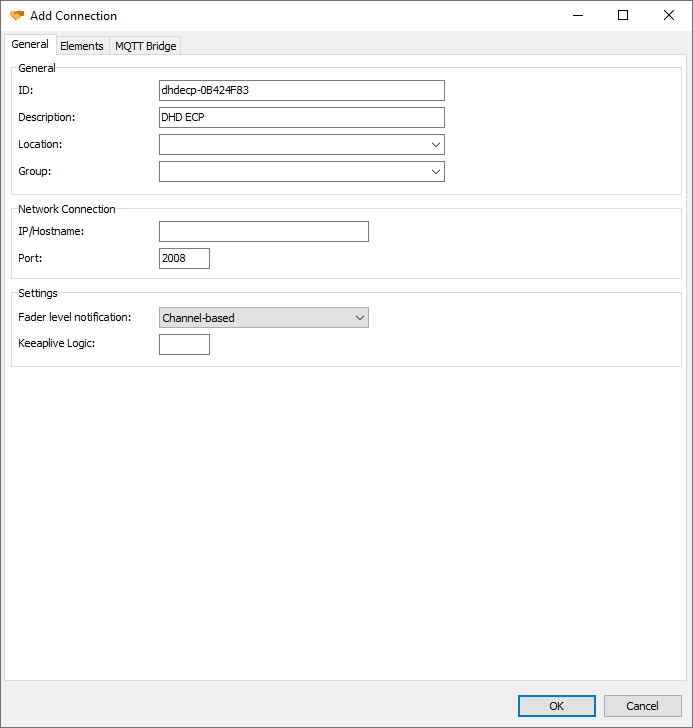
For a description of all available configuration settings, see the protocol reference.
To remove one ore more connections, select them in the connection list with the mouse (old down Shift or Ctrl to select multiple items), then click the - icon in the toolbar, or select Connection -> Remove from the main menu.
The right hand side of the Connections tab shows the status of the connection currently selected in the connection list.

The first tab displays the parameters provided by this connection, either as a flat list or as a tree structure. For each parameter, the following information is displayed:
The icon next to the parameter ID indicates whether the parameter is read-only (green arrow pointing left), write-only (red arrow pointing right), or read/write (double blue arrow).
For read-only parameters, the current value and timestamp is the one that was last received by the device.
For write-only parameters, the current value and timestamp is updated every time new value is set (manually or via a converter rule).
For read/write parameters, some protocols (e.g. Ember+) echo the new value after an update, and BTConnect does not update the columns until it receives this echo. For other protocols, updates are not echoed, in which case BTConnect updates the columns immediately when it sends the new value over the protocol.
For write-only and read/write parameters, you can perform a manual update by double-clicking the parameter and entering the desired new value in the dialog that appears.
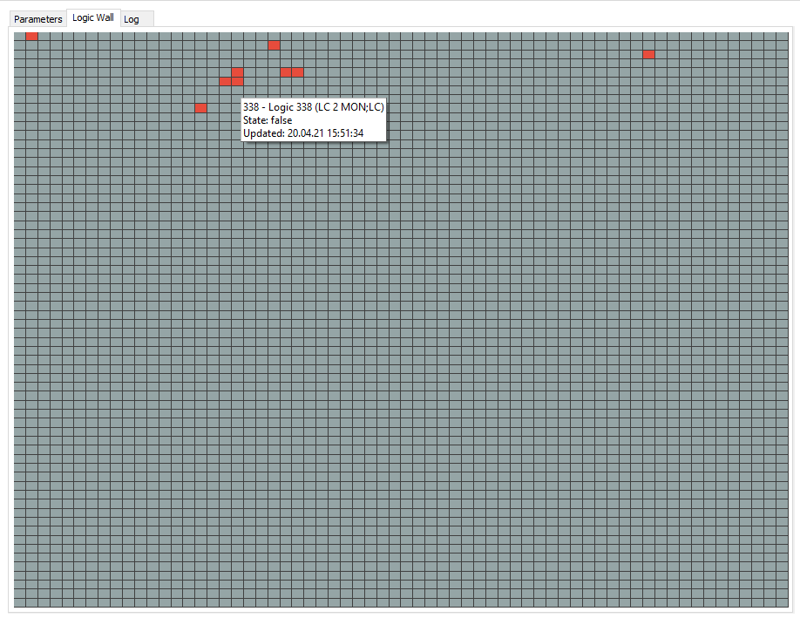
The Logic Wall tab is only available for connections of the types DHD ECP and Virtual Core. It shows a colored grid of the 4095 available DHD logics; green indicates that the logic is on, red indicate that the logic is off. When hovering with the mouse over a square, a popup shows additional information about that logic.
On the third tab, all log messages related to this connection are displayed. The log is limited to the last 1000 entries and will be truncated automatically. Using the checkbox at the bottom, you can turn on a debug mode which will write all parameter updates to the log.
The second tab of the main window is where the Protocol Converter is found, one of the most important features of BTConnect.
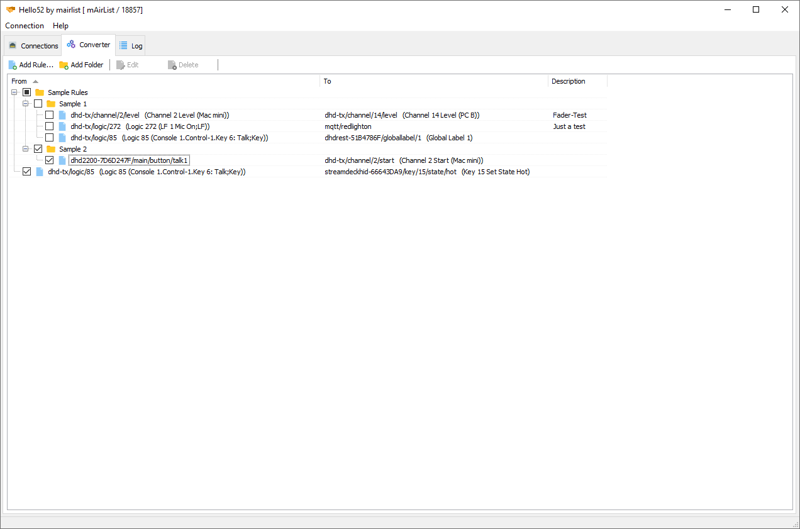
The Protocol Converter processes incoming values from connections (from readable parameters) and forwards them to other connection (to writeable parameters), possibly filtering and/or converting the values.
In other words, the Protocol Converter is where your devices are interconnected, and protocols are translated to each other.
The Protocol Converter maintains a tree of converter rules.
Each rule has one source parameter (which must be a readable parameter of any connection), and one or more destination parameters (which must be writeable parameters of those connections).
See Converter Rules below for details.
Rules can be enabled/disabled by clicking their checkboxex.
Rules can be grouped in Folders inside the rule tree. Folders can be nested. Use the mouse to move rules into a folder or back outside.
Clicking the checkbox of a folder will recursively enable/disable all rules inside that folder.
When a paramter update is received, the rule tree is processed top to bottom. You can rearrange the rules and folders with the mouse. This is useful when you have multiple rules with the same source parameter, and you care about the order in which they are processed.
Folders in the tree are processed depth-first; so on any particular level of tree, when a folder is encountered, the rules (and subfolders) of that folder are processed first, before going on with the other rules/folders on the higher level.
To add a new rule, click the Add Rule button, and this dialog will appear:

First, select the source parameter that should trigger this rule.
This must be a readable parameter of any connection.
Parameters are generally specified in the <Connection ID>/<Parameter ID> form,
e.g.
dhd-studio1/logic/87
where dhd-studio1 is the connection ID, and logic/87 the ID of the parameter.
Clicking the Select button will bring up a dialog that lets you easily select a parameter from any of the available connections:
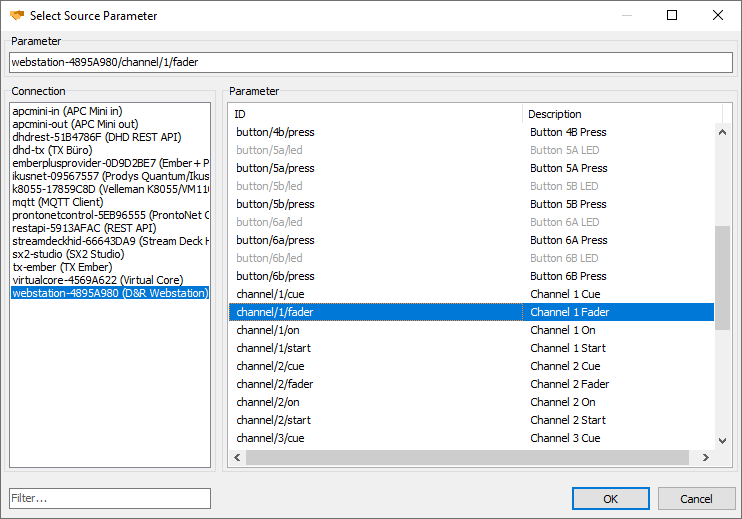
The parameter must be readable, obviously, so write-only parameters are grayed out.
The incoming parameter value can be converted or filtered. To edit these conversions, click the Edit… button in the Conversions section.
In the dialog that appears, use the Add, Edit and Delete button to manage the conversions. The items are processed top to bottom (you can rearrange them with the mouse), and the following types are available:
If the incoming value is of type boolean, the value is negated
(true is turned into false, and vice versa).
If the value is not if type boolean, it is converted to boolean first using a best-effort approach.
The output value is always of type boolean.
This conversion allows you to map incoming values to outgoing values.
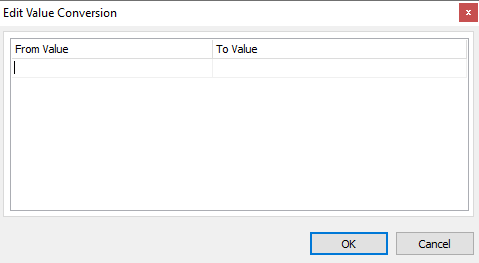
Enter one from/to pair per line. Use the cursor-down key to add more lines to the table.
Value mapping always operates on strings (the incoming value is converted to string if it is in another type).
With this conversion, you can scale an incoming numeric value, using a factor and an optional offset. Non-numeric values are converted to numbers first. The output is always a floating-point number.
This conversion allows you to convert a linear fader position to a dB value, using one of the available fader curves.
It is e.g. useful when using a fader on a MIDI controller (sending value of 0..127) as a volume fader with a dB scale.
This is the opposite of Fader Position to dB.
Use the conversion to replace any incoming value with a fixed output value.
With this conversion type, you can limit the processing of the rule to certain allowed values:
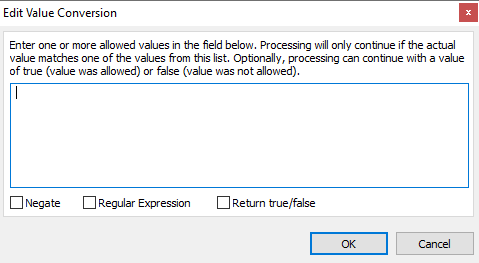
Enter one allowed value per line. The following options control the behavior of the filter:
true or false, depending on whether it matched (or did not
match) any of the values.Values are always treated as strings, and the incoming value is converted to string first.
It is possible to limit the processing of this rule based on the (cached) state of another parameter. In order to do so, select a Condition Parameter, and then click Edit… to edit the allowed values. The dialog is the same as for the Filter Values conversion described above.
In this section, you can add one or more destination parameters to which the value should be forwarded.
When you add a new destination, a dialog will be displayed where you can select the destination parameter from a list of available parameters, similar to the source parameter selection (but this time, the read-only parameters are grayed out).
In the Edit Destination dialog that appears (also when you edit an existing destination), there is an optional list of Conversions that you can edit, similar to the conversions of source (see above). Use this conversion list if your rule has multiple destinations, and you want some or all conversions only be applied to a particular destination.
You can enter an optional Description that will be displayed in the rule tree.
(Un-)checking Enable this rule has the same effect as clicking the checkbox in front of the rule in the rule tree.
(TODO)
On the Log tab, the current log messages from all connection as well as the main application and Protocol Converter can be viewed and inspected.
The current log of an individual connection can also be viewed on the Log tab of the connection status view.
Only the most recent 1000 messages are display in the main window.
Logs are automatically archived to disk, one file per day, in text/JSON format.
These files are written to the folder C:\ProgramData\BroadcastThings\Connect\Log.
There is a viewer built into the main application that can be used to browse and view these archived logs. It can be accessed from the main menu by selecting Tools -> Log Archive.